Images bring life to your WordPress posts and pages by making them more engaging. However, many beginners struggle with aligning images just the way they like.
The new WordPress block editor (Gutenberg) solves this problem by making it easier to add and align images in WordPress.
In this article, we will show you how you can easily add and align images in the WordPress to create beautiful content layouts.
Image Alignment in WordPress Editor
Previously, WordPress used a text area with editing buttons as its default editor. One particular issue in the old editor was image alignment.
Even though there were options to align images left, right, or center, they didn’t always look good. Sometimes images didn’t align, were not the exact size, or just looked odd.
WordPress 5.0 introduced a new WordPress post editor called the Gutenberg block editor. It fixed several problems with the old editor including the image alignment issues.
Let’s take a look at how you can easily add and align images in the new editor to create beautiful layouts for your posts and pages.
Add and Align Images in WordPress
The new editor comes with the following blocks that you can use to add images into your WordPress posts and pages.
- Image
- Inline Image
- Gallery
- Media & Text
- Cover
Let’s start with a simple image block first.
Click on the ‘Add new block’ button or type /image in the post editor to insert an image block.
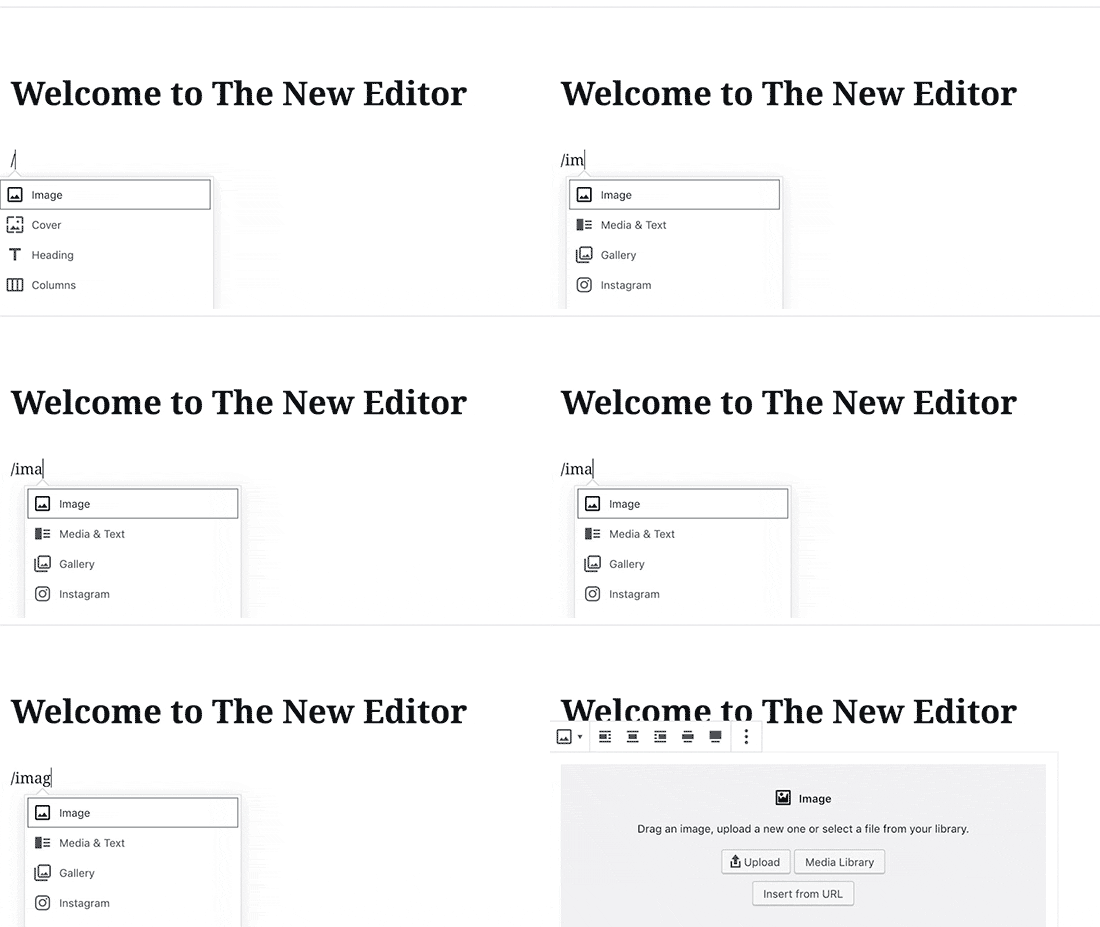
You will see three buttons inside the blank image block.
You can upload an image from your computer, select an already uploaded image from the media library, or insert an image by providing the image file URL.
Next, click on the ‘Upload’ button and then select the image you want to upload from your computer.
As soon as you select the image, WordPress will upload it to your media library and insert it into the image block.
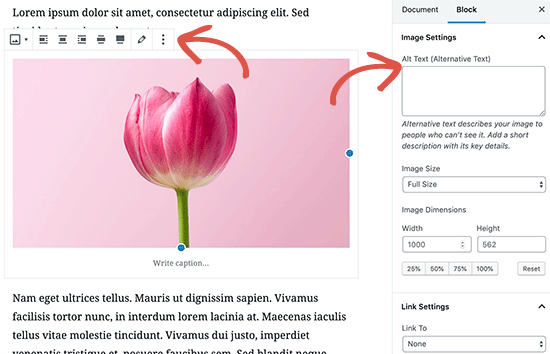
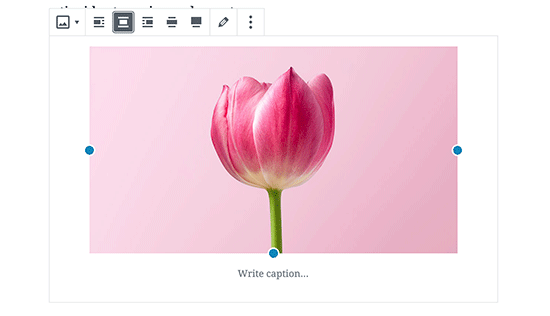
Now, you will notice a toolbar on top of your image and some image block settings in the right column. To align your image, you’ll be using the toolbar that appears on top of the image.
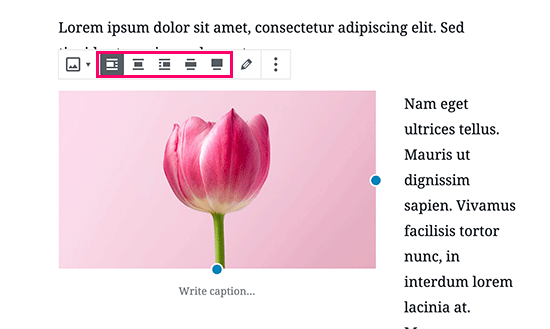
The image block gives you the following image alignment options as buttons in the toolbar.
- Align left
- Align Center
- Align Right
- Wide Width
- Full Width
If your image is smaller in width, then aligning it to the left or right will bring up text next to the image. Aligning it to the center will display the image on its own row with no text on either side.
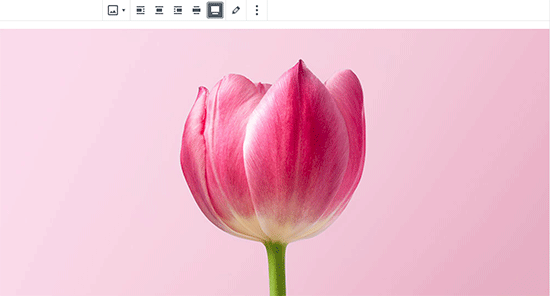
Choosing the wide width option will make your image wider than the text area, and the full-width option will push it to the right and left edges of the browser screen.
How to Perfectly Align an Image Next to Text
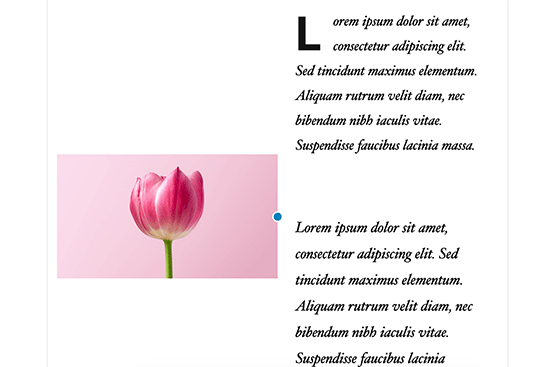
A lot of times you may need to perfectly align an image next to some text. WordPress block editor makes this easy by adding the Media & Text block.
This block basically adds a two-column area. One column for images (media) and the second column for text content.
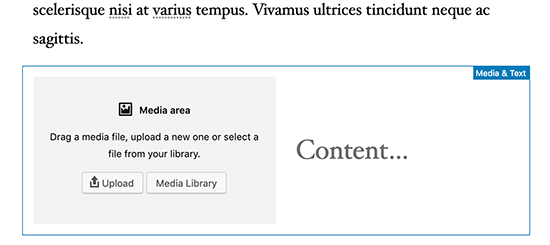
Simply upload your image and then add the text you want to display next to it.
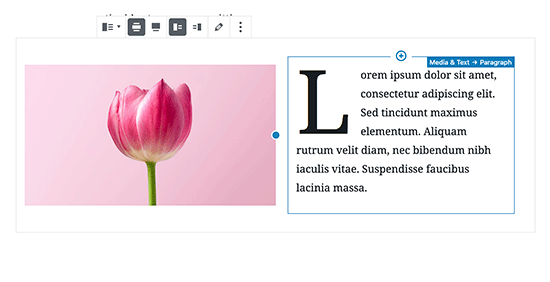
After adding the image and text, you will notice more options for the block. You can make the whole block wider or full-width, you can also switch the image and text sides.
The image’s alignment will automatically adjust to the height of the text in the next column.
How to Align Gallery Images in WordPress
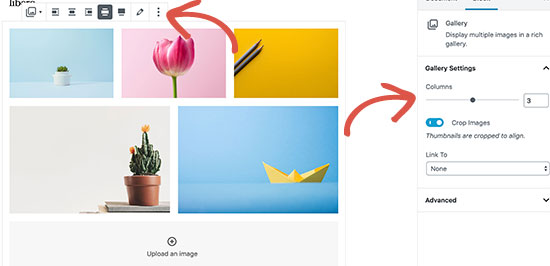
WordPress post editor also comes with a block to add image galleries. This allows you to easily display images in a grid of rows and columns.
The Gallery block comes with similar alignment options in the toolbar.
You can make the entire gallery block align to the left, center, or right. You can also make it wide or change it to a full-width row.
The default gallery feature in WordPress is quite good. However, if you regularly add photo galleries to your WordPress posts and pages, then consider using a photo gallery plugin like Envira Gallery.
These plugins will give you more options to align images in your photo galleries, display them in the popup, and style them differently.
How to Add Two Images Side by Side in WordPress
The easiest way to display two images side by side in a WordPress post is by adding both images in a Gallery block.
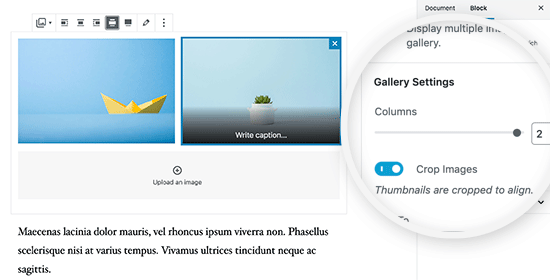
Simply select a 2-column layout for the gallery block to display both images next to each other. You can also check the ‘crop thumbnail’ option to make sure that both images are of the same size.
More Ways to Add and Align Images in WordPress
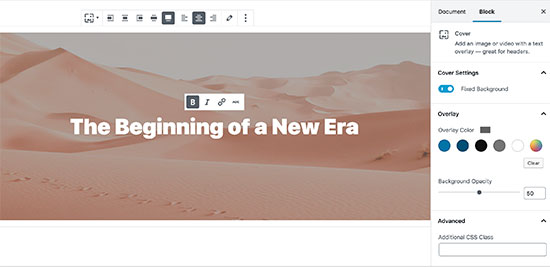
Apart from the image, media and text, and the gallery block, you can also use the Cover block to add a cover image.
In modern web design, cover images are used to create highly engaging content layouts. These images are used for highlighting different sections of a page.
The cover image block comes with the same alignment options as an image block. You can add text over the image and choose an overlay color from the block settings. The best part is that you can check the ‘Fixed Background’ option which creates a parallax background effect.
To learn more about using cover images, check out our article on the difference between featured images and cover image in WordPress.
So far we have talked about adding images directly to your posts and pages. What about images from third-party sites?
The block editor makes this easy as well. It comes with embed blocks for popular social sharing sites including Instagram, Flickr, Imgur, Photobucket, and more.
For example, if you want to add an Instagram photo, then simply add the Instagram block to the post editor and enter the URL of the post you wanted to share.
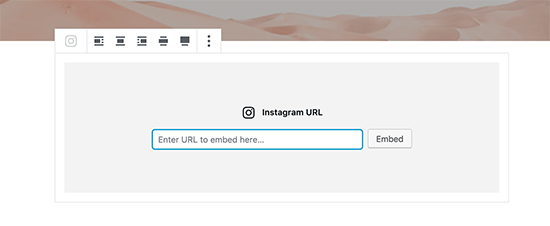
WordPress will automatically fetch the Instagram post and embed it for you. After that, you will be able to use the alignment options in the toolbar.
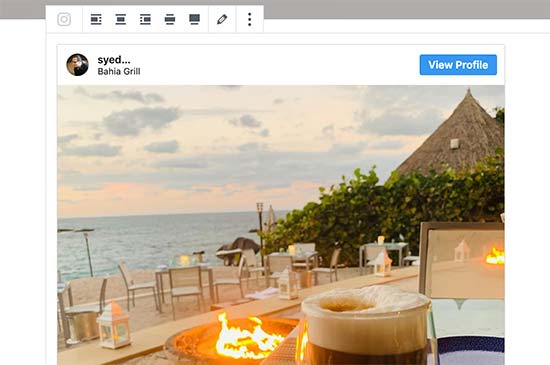
Embed blocks also allow you to easily embed videos in WordPress. After that, you can use the same options in the toolbar to align videos in WordPress.
We hope this article helped you learn how to easily add and align images in the WordPress block editor. You may also want to see our guide on how to optimize images to speed up WordPress.
If you liked this article, then please subscribe to our YouTube Channel for WordPress video tutorials. You can also find us on Twitter and Facebook.
The post How to Add and Align Images in WordPress Block Editor (Gutenberg) appeared first on WPBeginner.
source https://www.wpbeginner.com/beginners-guide/how-to-add-and-align-images-in-wordpress-block-editor/
No comments:
Post a Comment