WordPress 5.0 was released with the brand new Gutenberg block editor and a host of cool features. One of them is the Cover block, which lets you add cover images to your posts and pages.
This feature has confused some users because it may seem similar to the Featured Image option which has been in WordPress since WordPress 2.9.
In this article, we’ll explain the differences between cover image vs. featured image in WordPress block editor.

What is a Cover Image?
A cover image is usually a wide image used as a cover photo for a new section in a blog post or page. It is part of the overall article. You can use a cover image when you’re starting a new section or a new story within your article.
With the Cover block in WordPress, you can add text and color overlay on your cover image.
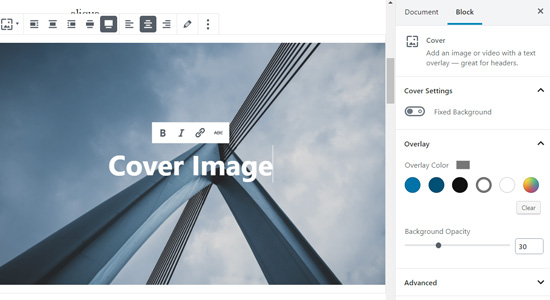
By adding an appropriate color overlay that matches your theme color or content’s mood, you can make your article more engaging.
Similarly, adding text overlay helps your users easily identify where a new section starts in your article and what’s it about.
Traditionally bloggers use heading text to separate sections in a blog post. With cover images, you now have options to separate sections in a more visually appealing way.
What is a Featured Image?
A featured image (also known as post thumbnail) is the main article image which represents the content. They’re prominently displayed on your website on single posts, blog archive pages, as well as on the homepage of news, magazine, and blog websites.
Aside from that, featured images are also displayed on social media feeds when an article is shared.
Featured images are designed carefully to make them look attractive. Such images give users a quick glimpse of your content and prompt them to the entire article.
You’ll find a meta box in your post edit screen for adding a featured image because almost all WordPress themes support featured images by default.
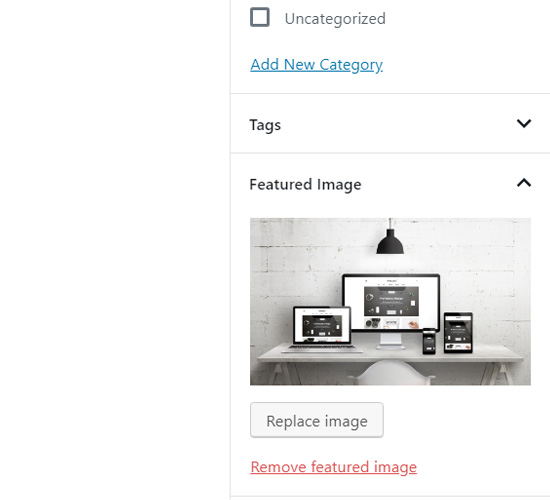
Where and how featured images are displayed is controlled entirely by your WordPress theme.
For advanced featured image options, you can check these best WordPress featured image plugins.
How to Add a Cover Image in WordPress?
The new WordPress block editor (Gutenberg) comes with a Cover block to allow you to add a cover image in WordPress.
First, you need to create a new post or edit an existing one. On the post edit screen, click on the add new block button and then choose Cover block.
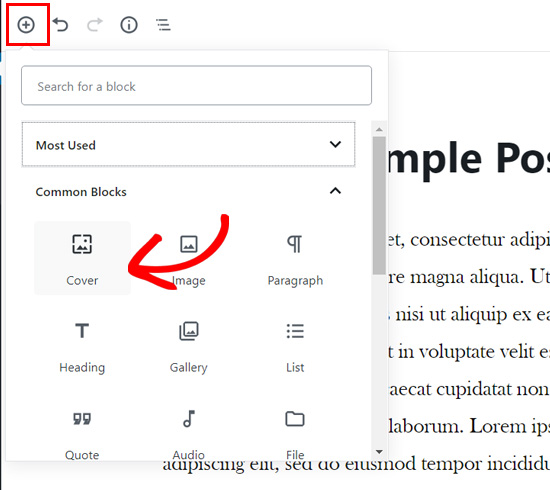
You can find the Cover block inside the Common Blocks tab.
Upon clicking on the block, you’ll see the Cover block added to your content editor with options to add your new cover image.
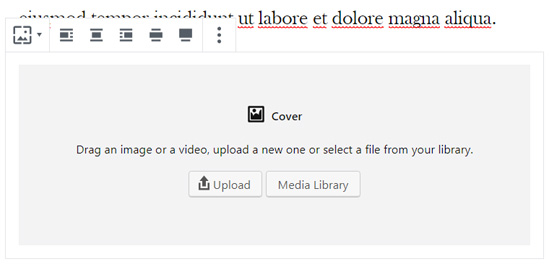
You can simply drag and drop an image or video in the block area to upload a new cover image. Alternatively, you can click the Upload button, choose an image in your computer, and open to upload.
If you want to add an image already uploaded to your media library, you can click the Media Library button and select an image from your media gallery.
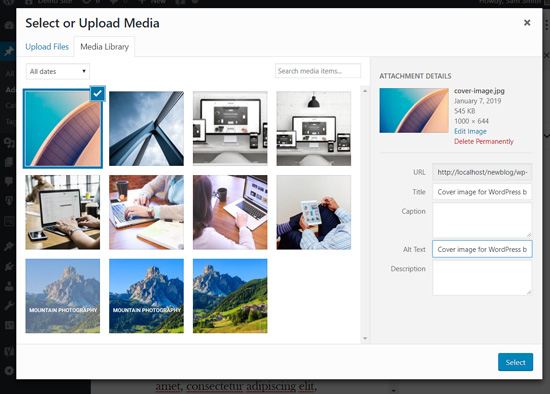
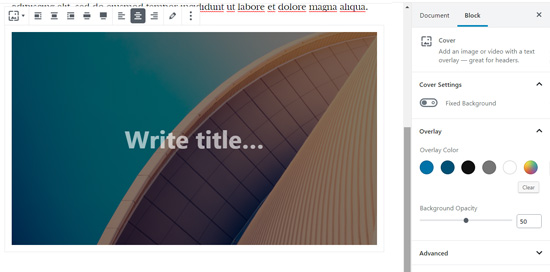
Once your cover image is added, you can easily customize it by clicking on the cover image.
This will show you a toolbar with customization options above the image, Write title… field in the center of the image, and block settings including color overlay in the panel on the right side.
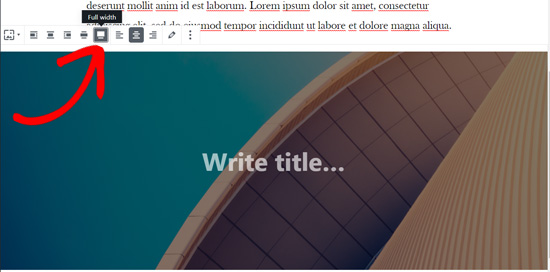
Aside from alignment option, the cover image block gives you the two width choices: Wide width and Full width.
The wide width option makes the image look as wide as your content. The full-width option makes your image cover the whole window screen.
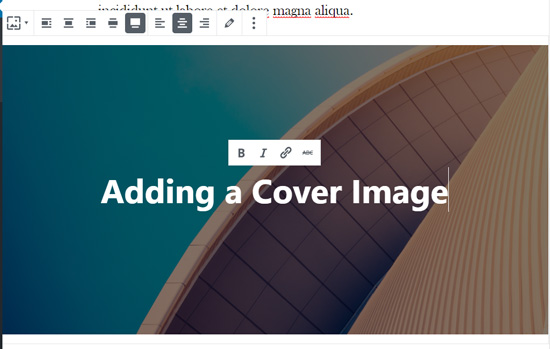
Next, you can add a title for your cover image. When you click on the cover image, you will see the “Write title…” field in the center of your cover image.
Simply click on that area to add text. You can write your cover image title and format it using the formatting options that appear on top of the text or on top of the cover image.
Finally, there are cover block settings on the right side panel. You can enable Fixed Background to create a parallax effect for when users scroll down the page.
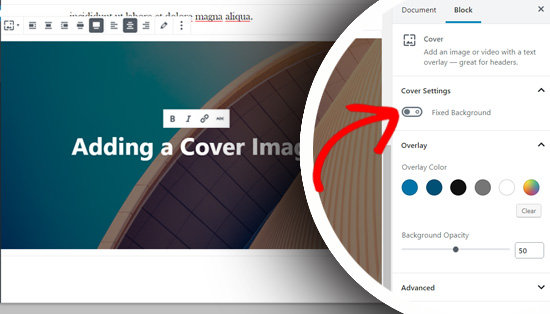
Below that, there’re color overlay options. By default, it adds your theme’s color as overlay color with 50% transparency, but you can change the overlay color and also change the opacity by moving the point.
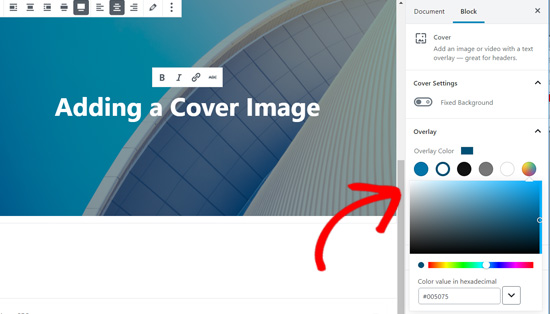
Lastly, you can add CSS code and add more styles to your cover image by clicking the Advanced option.
That’s it!
You can repeat this step to add multiple cover images in a single article if needed.
How to Add a Featured Image in WordPress?
The process of adding a featured image is the same as it was before. If you’ve had a WordPress blog for a while, then you already know how a featured image is added.
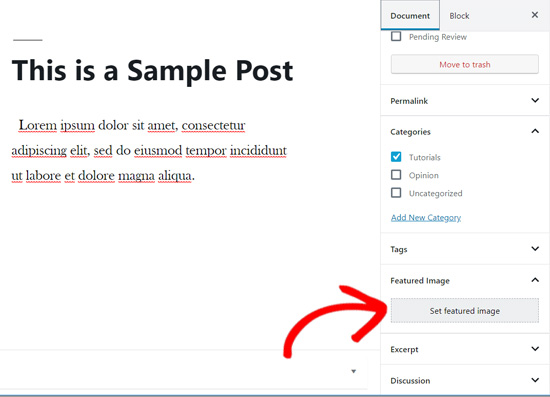
To add a featured image, you’ll need to open a post edit screen firs and then navigate to the Featured Image meta box on the right-hand side of the screen.
You will need to click the Set featured image option.
Next, you can upload a new image by either using the drag and drop uploader or selecting an image one from your existing media library.
After that you can add title and alt text for your featured image, and then click the Select option.
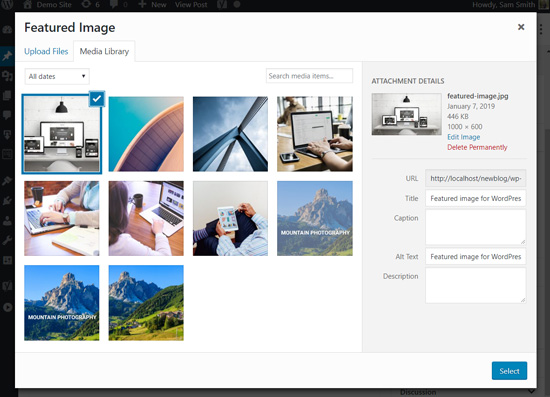
You have successfully added a featured image to your article.
If you want more detailed instructions, then you can read our beginner’s guide to adding featured images in WordPress.
Once you’ve added your featured image, you can preview your post and see how it looks.
If you’re using the new default theme Twenty Nineteen or other modern themes, then you may see a color overlay on your featured images as well.
You can remove it or change the color by going to the WordPress customizer.
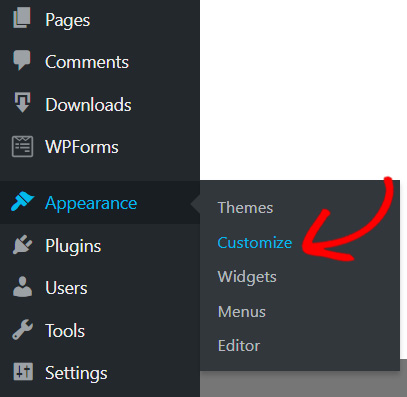
Simply click on the Appearance » Customize button in your WordPress menu.
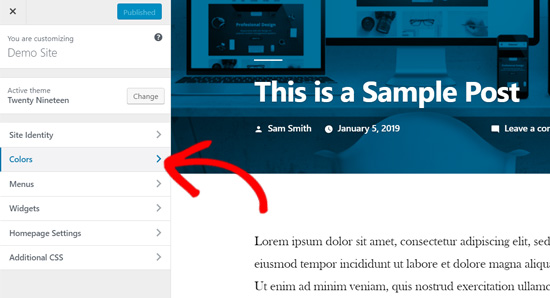
Once on the Customize panel, you need to click the Colors option on the left.
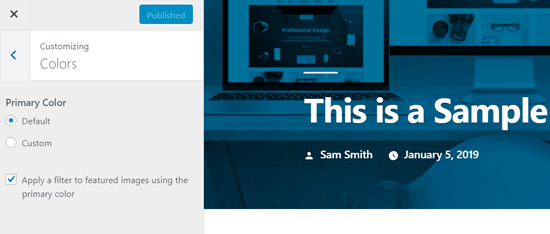
On this tab, you will see your theme’s primary color option and the option to enable or disable the image filter.
You can change your theme’s primary color by selecting the Custom option and choosing a color.
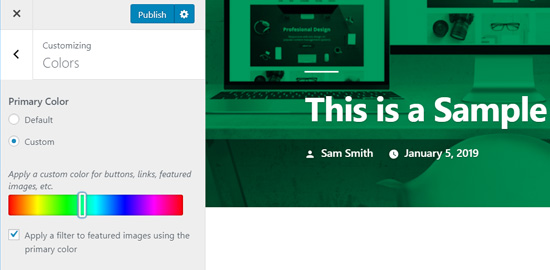
If you want to disable the color filter on your featured images, then you can simply remove the check on “Apply a filter to featured images using the primary color” option.
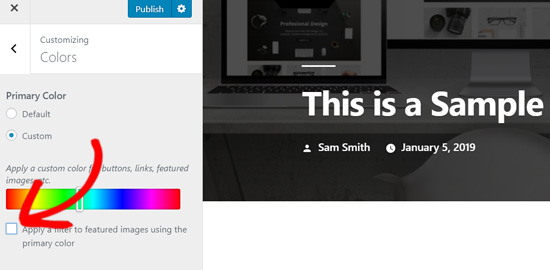
Please note that featured images are managed by WordPress themes, so you may not find this option in your theme if it doesn’t support image filters.
Conclusion – Cover Image vs. Featured Image in WordPress
Now that you know how to add a cover image and a featured image, let’s take a look at some best practices.
Featured images have been popularly used by WordPress blogs, online magazines, news, and entertainment websites as post thumbnails or main article images.
Well-designed featured images help attract more users to open an article. They’re great for making your website look attractive and visually interactive.
Cover images are actually parts of your article. A user sees your cover image after they open your article to read. Thus, they make your articles more engaging and fun to read.
The best use of cover images is to add beautiful transition between sections inside a long article.
Cover images are unique from regular post images because they have the full-width option and you have the ability to add text overlay on them.
By properly adding cover images, you can improve user engagement on your posts.
We hope this article helped you to understand the difference between a cover image and a featured image in new WordPress block editor. You may also like to read our article on how to update your old WordPress posts with Gutenberg block editor.
If you liked this article, then please subscribe to our YouTube Channel for WordPress video tutorials. You can also find us on Twitter and Facebook.
The post Cover Image vs. Featured Image in WordPress Block Editor (Beginner’s Guide) appeared first on WPBeginner.
source https://www.wpbeginner.com/beginners-guide/cover-image-vs-featured-image-in-wordpress/
No comments:
Post a Comment